WELCOME TO WORLD CARD MAKING DAY – 2024!
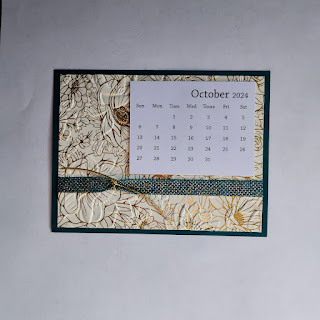
Desk Top Calendar – this project is mailable and makes a great gift! Make sure to order your calendars early, link below.
Here are the three choices we offered:
The map of our geographical region - the Upper Peninsula of Michigan - was the most popular. The U.P. = Yoop or Yoopers. We are very proud of the community spirit and caring, helpful nature of our people.
I've chosen the Splendid Autumn papers for you today.
You can craft along with Stampin' Up! by clicking on this link, World Card Making Day.
Our own event for World Card Making Day 2024 is at our local library. Four of the members of my in-person class have joined me again this year to demonstrate projects and craft together. I'm so pleased that our public library has welcomed us to share our love of card making - that's our goal today - to share what we love - paper crafting while in community with others.
* In 2021, we were offered a space, free of charge, to host our first WCMD afternoon
* In 2022, we hosted our event, including lunch, at our newly built senior center
* In 2023, we invited the community to join us at the new bakery's shared space
* In 2024, we'll be at our public library, Leverton Community Room. View photos from today's event on my Facebook page - Card Connoisseur Susan Boback.
Desktop Calendar
The measurements are written for 12" cardstock, but you could use an 11 1/2" piece and adjust the 1" difference in your score lines. (I have not included those measurements)
Here is the desk top calendar I received last year as a gift from a fellow team member, Susan L.
Calendar Base measures: 12 x 5 ½”. Choose white or a color to coordinate with your theme. Stampin' Up! carries 12x12 in white and colors - here's the link, 12x12 cardstock
Score: on the 12” side, from the left, and working across to the right side: score at ½”, 2”, 3 ½”, 7 ¾”. That leaves you with a 4 ¼” section on the far right, which is the main section of the calendar.
Fold: each scored section. The ½” end piece is the “tab” that attaches the left to the right end to form a triangle with a pleat in the bottom. Glue the ½” section to the opposite end, then fold the 2” section in so that it makes a stand for the calendar.
Front Layers:
Solid Cardstock: 4” x 5 ¼” Pecan Pie color cardstock is my choice to coordinate with this paper
Background layer: 5” x 3 ¾” This is the Splendid Autumn Designer Series Paper
To add a border layer, as in the daisy example above, cut a piece of contrasting paper at 1” x 5” and layer it on according to your design.Ribbon: 7” plus a 3” piece to tie around. I've used the Natural Tones Linen Thread, but use any fibers that coordinate with your design.
Assemble by adding the twine to the main layer. Attach around to the back on each side with Tear & Tape (double sided tape). Pull it tight, but not so tight that the paper bends. Tie a short piece to the twine and twist the fibers to fray them.
Position your calendar on the layer, leaving some space for the design to be seen.
Attach to the solid color cardstock layer, then attach it to the calendar base.
Alternative print - you could use a 4x6" landscape view photo in place of the patterned paper, by trimming 3/4" off of one end; or a child's artwork.
Now you have the date right in front of you in your craft room or anywhere you need a beautiful reminder. This desk calendar does fold for mailing - check the thickness for additional postage.
Calendar source: Vippies Designs @ vippies.com OR for a slightly larger calendar, TayloredExpressions.
View the latest catalogs and promotions by clicking the link on this page. Go Get Creative!
Thanks for stopping by! Now hop over to see the next creative design!sb


Beautiful calendars!
ReplyDeleteThis calendar is a great idea! Pretty and practical.
ReplyDeleteGreat idea Susan x
ReplyDeleteSuch a great gift idea! With the new year only a few months away, this is a great reminder to get those projects started! :D
ReplyDelete