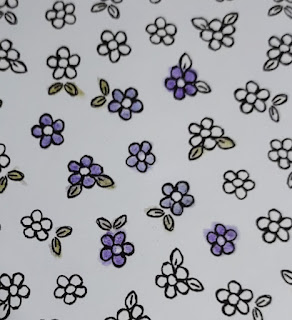
Use your Water Color Pencils (not colored pencils) to
add subtle color to an image or die cut as though it was ink. In today’s projects, NO ink is used, but the
result appears to be so. I'll use all of the colors, except white. See a project with white WC Pencil at the end.

SUPPLIES: Water Color Pencils (#161700, #149014), Water Painter (#151298) or Paint Brush, Basic White Cardstock (#159276), Fluid 100 Water Color Paper (#149612),
Blender Pen (#102845), Water Spritzer (#126185), Silicone Craft Sheet (#127853).
PAPER: Basic White Cardstock is good for designs with
color pencils. Use water sparingly as the fibers in the paper are broken down
by excess water and the rubbing of the pencil on the wet surface. By using Water Color Paper, the water
is absorbed into the fibers, and although there may be some warping, the design
is not distorted. The water color paper has a slight texture to it, but that
does not affect the design (in my opinion).
Here's a few techniques to use your Water Color Pencils as ink:
#1 PENCIL on dry CARDSTOCK or WATER COLOR PAPER: Use
white cardstock, water color paper or similar paper (I tried “onion skin” paper
in my second example below). Color at random or for a background design. Add a
drop of water with a paint brush or Water Painter. Use the brush to spread
the water over the area of pencil color.
Water Color Pencil on Water Color Paper, above photo. When you add water, you can spread the color as seen on the edges.
"Onion Skin" paper is above. Dry your print in a warm area – sun on a window sill, old radiator, or use
your heat tool. Stamp on top of this background print as I've done with the onion skin paper print. If you don't like your print, set it aside for later - it will be great for die cuts.
#2. WATER on WATER COLOR PAPER: Cover a 4x6 space with
a light coat of water. Immediately,
while paper is still wet, add color with pencil. See the instant look of ink.
NOTE: As in photo below, If you use cardstock instead of water color paper, the fibers could break down because the paper isn’t made to absorb water. See below.
#3. PENCIL DIRECT to STAMP - This is one of my favorite ways to make water color prints. Use a Cling/Rubber or Photopolymer stamp. Spritz it lightly with water. Color directly on the stamp with your Water
Color Pencil. Lay the pencil on its side, not using the tip, and scribble
quickly over the stamp. Stamp directly onto Basic
White cardstock. There shouldn't be any issues with the paper warping as shown above, because of the low water content. (So Very Merry Stamp Set #162345)
For more examples, refer to a post on this page dated April 18, 2022.
On the prints below, I've used this technique on the sentiment stamp as well as the bird.
BLENDER PEN: when water is not an option,
for a small space emphasis, use the tip of a Blender Pen to push the color into
little corners or to darken the color in a small area. When you are finished
blending, clean the Blender Pen tip by rubbing the color out of it till the end writes clear.
Here, with Zany Zoo Designer Series Paper, I've added color to the image as seen below.
The photo below shows an image filled in with color from a WC Pencil.
In the photo below, see the difference between the space where it has been colored with WC Pencil only (left leg) and the rest of the image with the Blender Pen.
Images above with WC Pencil. Images below show the brighter colors with the Blender Pen, then more of the color was added to other flowers from the pen tip.
WHITE Water Color PENCIL:
The White
Pencil can be used with water, like the colors. Most likely, the White WC Pencil
would be used on bright or dark cardstock.
The technique that I have found to work the best is #3 above, Pencil to Stamp. Spritz the stamp with water.
Scribble with the White WC Pencil liberally on the stamp, then immediately
stamp it on bright or dark paper. You
may be able to get more than one print out of one
application of pencil to
stamp. The WC Pencil image will dry brighter than it looks when its wet.
I hope you’ve learned something new or refreshed your
abilities. I’ve always loved water color prints. How about you?
Will you try this water color technique?
Post your prints at Card Connoisseurs on Face
Book. Click on the link above on the right.
I’m an Independent Stampin’ Up! Demonstrator – I joined to
upgrade my tools and be part of a creative community. I haven’t looked back! I’m so amazed at all I’ve learned and share
being part of a team. I love the Make Mode and then the Send Mode – knowing you’re cheering up someone’s day. And
then the Joy Return Mode that says – You Made My Day!
There's an amazing JOIN deal Oct. 3 - Oct 31, 2023. Celebrate 35 Years of Stampin' Up! To JOIN you can choose to pay $35 less for the starter kit and still get $125 for $64.35 of your choice of products with FREE shipping or choose 35% more products, giving you $168.75 for $99.
If you’re looking for a 20% discount and a
creative community, Join my team - Card Connoisseurs! And there's no obligation to order another thing beyond the Starter Kit. You can't beat this deal!
Check out my projects and my Why over at www.cardconnoisseursb.stampinup.net.
Thanks for stopping by and be blessed! SB


No comments:
Post a Comment